We understand that businesses (from small to large) rely heavily on a robust storage of any kind – but because NAS allows multiple users of accessing and using it simultaneously, we figured that we’d do a quick walk-through on how to create the best, secured QNAP set up for the work environment. We have also put into slide shows for quick tutorials/demos.
Create multiple users and edit privilege settings
In a work environment, ideally, every employee who would use the QNAP would need their own dedicated user ID/password.
[slideshow_deploy id=’1010′]
Shared folder creation / privilege settings
Create shared folders on the QNAP to divide and organize your work files. Marketing would have a “marketing” folder, and only the people under marketing can access the folder.
[slideshow_deploy id=’1016′]
Configure your router
QNAP can configure your router so that it will allow you to remote access your NAS wherever you are.
[slideshow_deploy id=’1028′]
myQNAPcloud set up
Set up the myQNAPcloud settings so that you can give your QNAP a unique link, so when you want to remote access, you can just access it with that link.
[slideshow_deploy id=’1034′]So right now, we’re going to use FTP as an example for demonstrating on how to remote upload/download/access your QNAP. In the next slideshow, we will demonstrate on how to connect to your QNAP via Filezilla / FTP service with your devices’ dedicated link.
FTP set up
Setup FTP in just a few clicks to let others upload/download/edit/delete files from the QNAP. Privilege settings can be customized for each users.
[slideshow_deploy id=’1019′]
Backup to another QNAP NAS (Remote location) via RTRR
Setup remote replication jobs in the Backup Station in the QTS UI. Backup the NAS, or selected share folders in the NAS.
[slideshow_deploy id=’1099′]
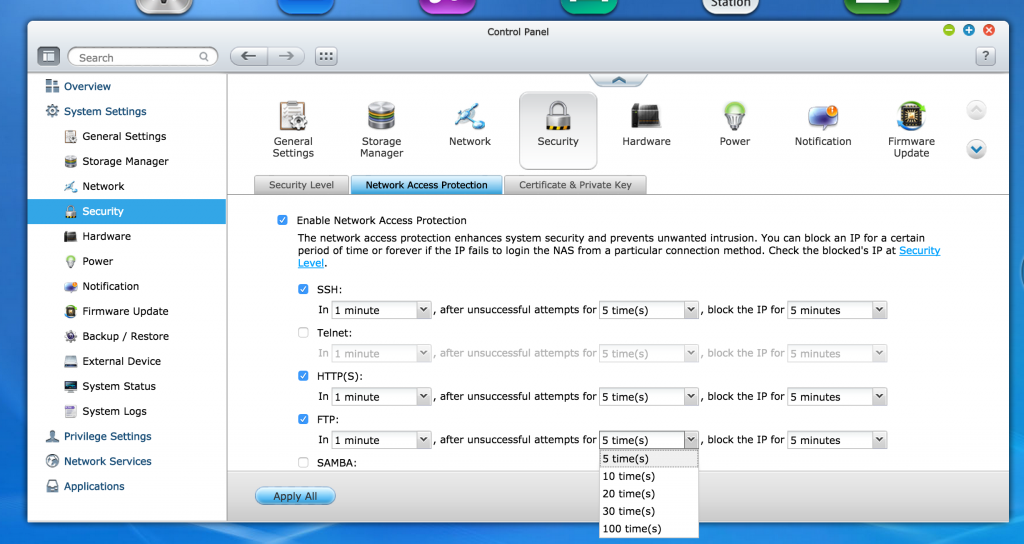
Set up FTP, HTTP(S), SSH Network Access Protection
When your NAS is hooked up to the public network, it’s best to also have firewall settings configured which can prevent you from malicious attacks. Go to System Settings -> Security -> Network Access Protection and check off the designated protocols that you’d like to configure. Hit “Apply All” and save.

