


Many users and system integrators have run into the challenge that 4Kn NVMe™ drives are not compatible with VMware vSphere ESXi™ environments. In this blog I’ll walk you through two ways to address this when using our 4K NVMe drives for use with VMware vSphere.
4Kn Drives
4096 byte (4K) sector drives emerged as a way for hard drives to support higher capacity by creating better utilization of space with optimized data placement. Like hard disk drives, SSDs can be formatted to different sector sizes and since many operating systems provide optimal performance with a sector size of 4096, this is the default for many of the latest devices. Some systems and applications are not yet able to take advantage of 4Kn (4K native) drives, and these may require reformatting for compatibility.
If you’re using the 800GB and 960GB versions of the Ultrastar® DC SN630 and Ultrastar DC SN640 drives, these come with default 512 byte sector format so no changes are needed. However, the other capacities (up to 7.68TB[1]) of the SN630, SN640 and our ultra-low latency Ultrastar DC SN200 ship formatted as 4096 byte sectors by default so need to be reformatted to 512 bytes before they can be used.
VMware vSphere and NVMe 4K Drives
Here is a step by step guide on how to reformat 4Kn NVMe devices to 512 bytes under two scenarios:
1) VMware vSphere has already been installed. In this case I show how to reformat NVMe devices using VMware vSphere ESXi Shell via esxcli
2) Installing VMware vSphere onto a 4kn device – I show how to reformat a 4096 byte sector device to 512 byte during the installation process using the installer’s ESXi Shell.
VMware Already Installed
If not already enabled, under “Troubleshooting Mode Options” -> Enable ESXi Shell (and SSH if needed).
Take a note of the serial number of the device you want to reformat and enter the ESXi shell (ALT-F1 or SSH).
List the available NVMe devices, there are six in this system:
[root@localhost:~] esxcli nvme device list
HBA Name Status Signature

------ ------ ----------------------
vmhba2 Online nvmeMgmt-nvme001340000
vmhba3 Online nvmeMgmt-nvme001350000
vmhba4 Online nvmeMgmt-nvme001360000
vmhba5 Online nvmeMgmt-nvme001370000
vmhba6 Online nvmeMgmt-nvme001750000
vmhba7 Online nvmeMgmt-nvme001760000
Before reformatting a device, check to confirm you have the right device (model and serial number):
[root@localhost:~] esxcli nvme device
get -A vmhba6 | egrep "Model|Serial"

Serial Number: SDM000061C27
Model Number: HUSMR7632BDP301
To format to 512 bytes you’ll need to know the LBAF format IDs the device supports so you can select the correct LBAF. You can get this from the namespace identify command:
[root@localhost:~] esxcli nvme device namespace
get -A vmhba6 -n 1 | tail -30

Percentage Remains to Be Formatted: 0 %
Namespace Atomic Write Unit Normal: 0
Namespace Atomic Write Unit Power Fail: 0
Namespace Atomic Compare and Write Unit: 0
Namespace Atomic Boundary Size Normal: 0
Namespace Atomic Boundary Offset: 0
Namespace Atomic Boundary Size Power Fail: 0
NVM Capacity: 0x2ea00000000
Namespace Globally Unique Identifier:
0000000000000000000cca0c02217000
IEEE Extended Unique Identifier: 000cca0c02217000
LBA Format Support:
Format ID: 0
LBAData Size: 512
Metadata Size: 0
Relative Performance: Best performance
Format ID: 1
LBAData Size: 512
Metadata Size: 8
Relative Performance: Good performance
Format ID: 2
LBAData Size: 4096
Metadata Size: 0
Relative Performance: Best performance
Format ID: 3
LBAData Size: 4096
Metadata Size: 8
Relative Performance: Better performance
The above example is from an Ultrastar DC SN200 NVMe drive, format ID 0 (LBAF = 0) corresponds to 512 byte sectors 0 bytes metadata.
Here is the current storage device list:
[root@localhost:~] esxcli storage nmp device
list | grep Display

Device Display Name:
Local NVMe Disk
(t10.NVMe__WUS3BA176C7P3E3__1266000081EE1400)

Device Display Name:
Local ATA
Disk (t10.ATA__HBS3A1924A4M4B1__A053C4AB__)

Device Display Name:
Local ATA Disk
(t10.ATA__HBS3A1924A4M4B1__A053C572__)
At the moment, two SATA and one NVMe device are visible.
Format the device using in this case LBAF = 0
[root@localhost:~] esxcli nvme device namespace format
-A vmhba6 -f 0 -n 1 -m 0 -p 0 -l 0 -s 0

Format successfully!
Note that for SN200, 512 bytes + 0 corresponds to LBAF = 0 (-f 0). For SN630, 512 bytes + 0 corresponds to LBAF = 1 (so -f 1)
The device is now available to VMware:
[root@localhost:~] esxcli storage nmp device
list | grep Display

Device Display Name: Local NVMe Disk
 (t10.NVMe_WUS3BA176C7P3E3____1266000081EE1400)

Device Display Name: Local NVMe Disk
(t10.NVMe_HUSMR7632BDP301____007021020CCA0C00)

Device Display Name: Local ATA Disk
(t10.ATA_HBS3A1924A4M4B1____A053C4AB__)

Device Display Name: Local ATA Disk
(t10.ATA_HBS3A1924A4M4B1____A053C572__)
Reformatting During Installation
Now let me walk you through of a method of reformatting these devices to 512B format during installation using the VMware ESXi Shell. This installation was via BMC remote console so the screen shots could be captured though PXE/USB install should be no different. ESXi Shell (during installation) doesn’t support standard esxcli commands, but the process is broadly similar to the above.
During VMWare install, when EULA is displayed, press ALT-F1 to open a terminal shell, login as root, with no password.
To see the NVMe devices installed in the system:
/opt/vmware/nvme/esxcli-nvme-plugin –-op nvme.device.list 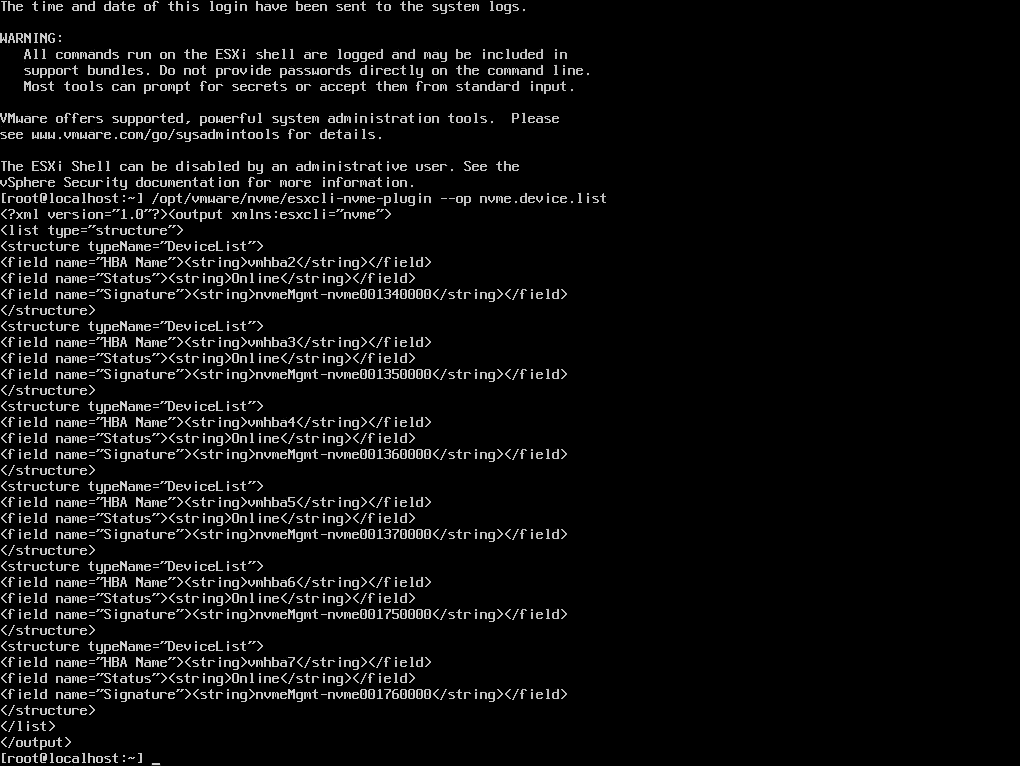
This shows the attached NVMe devices and their adapter numbers. In this case there are 6 NVMe devices installed.
Always check the model and serial number of the device you wish to install:
/opt/vmware/nvme/esxcli-nvme-plugin –-op
nvme.device.get –A vmhba7 | egrep –A1
“Model|Serial”
Check the required LBAF format for 512B + 0B metadata, this can be retrieved from namespace identify.
/opt/vmware/nvme/esxcli-nvme-plugin --op
nvme.device.namespace.get –A vmhba7
–n 1 | tail -40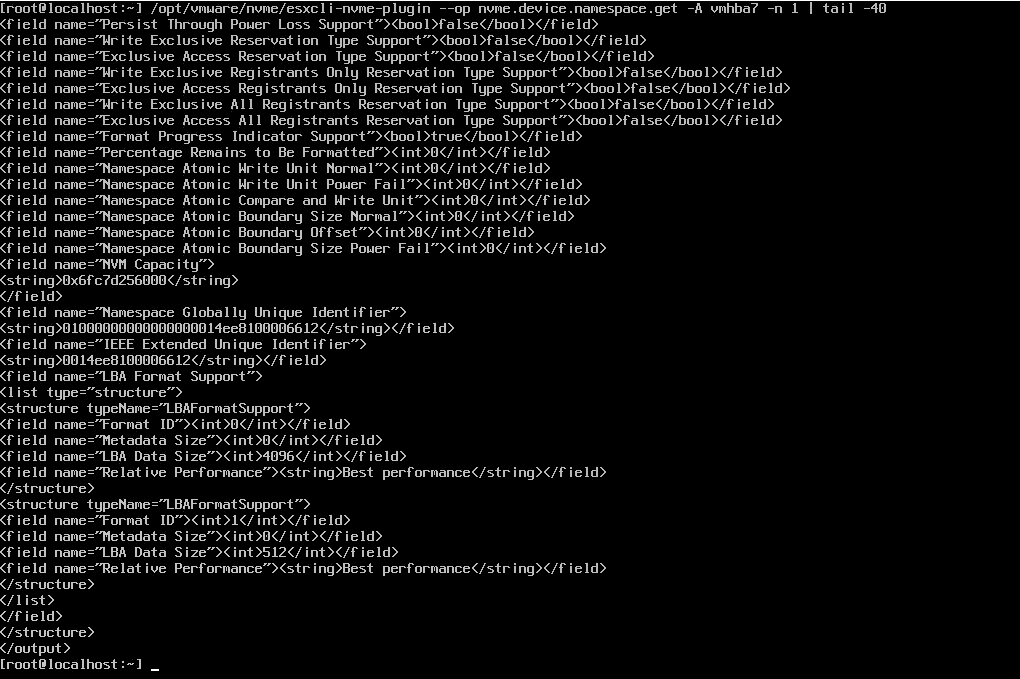
As you can see in the above, the LBA Format Section shows two entries. LBAF (Format ID) = 0 is 4096 + 0 metadata and LBAF (Format ID) = 1 is 512 + 0 metadata byte sectors. If you have a different SSD, you can just check which LBAF number (Format ID) corresponds to 512 + 0 (for example for the SN200 it is “0”).
To format (change -f <x> to match the LBAF for 512bytes +0 for your device if it is not an Ultrastar DC SN630)
/opt/vmware/nvme/esxcli-nvme-plugin --op
nvme.device.namespace.get –A vmhba7 –f
1 –n 1 –m 0 –p 0 –l 0 –s 0
This took about 30 seconds on the 7.68TB Ultrastar DC SN630.
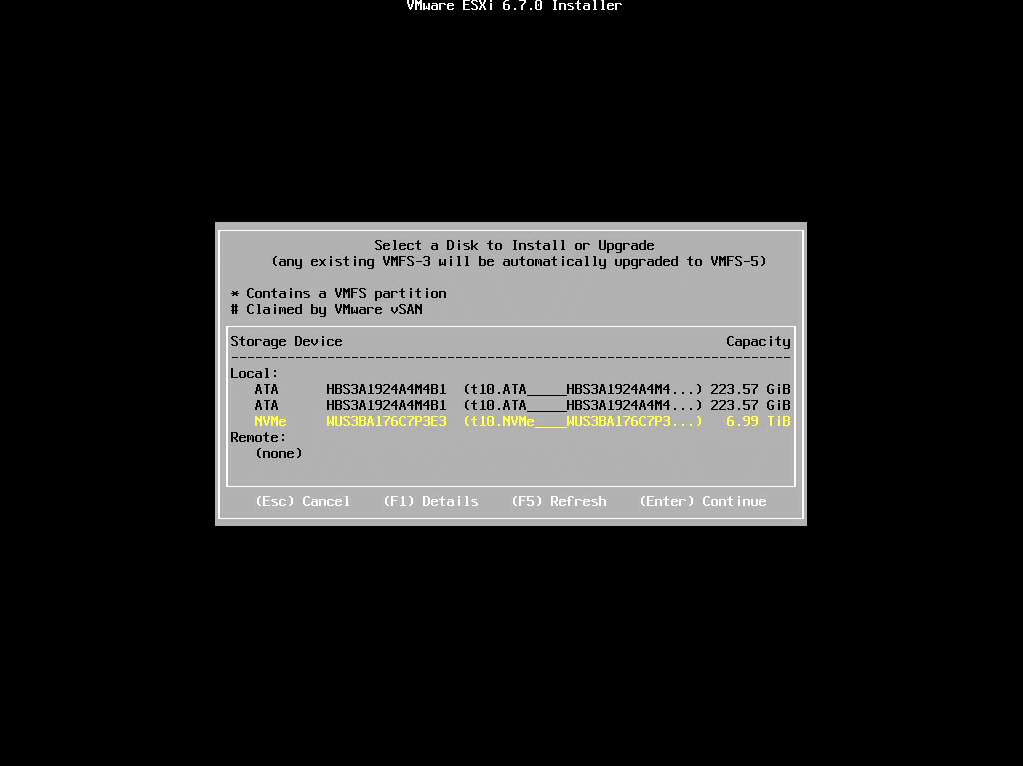
ALT-F2 will take you back to the main installer screen, where you can now proceed to select the installation disk and can install to the 512B formatted NVMe device:
I hope you found this guide helpful. If you have any comments or questions, don’t hesitate to reach out and leave me a comment below on this blog.
Learn more about our NVMe drives here.
VMware customers are able to verify Ultrastar® and Wetern Digital IO Devices compatibility at the following link: https://www.vmware.com/resources/compatibility/search.php
[1] One megabyte (MB) is equal to one million bytes, one gigabyte (GB) is equal to 1,000MB (one billion bytes), and one terabyte (TB) is equal to 1,000GB (one trillion bytes). Actual user capacity may be less due to operating environment.