


Enabling HybridMount on your QNAP NAS with B2 is easy. We’ll now show you how so you can try it out today and see the benefits yourselves!
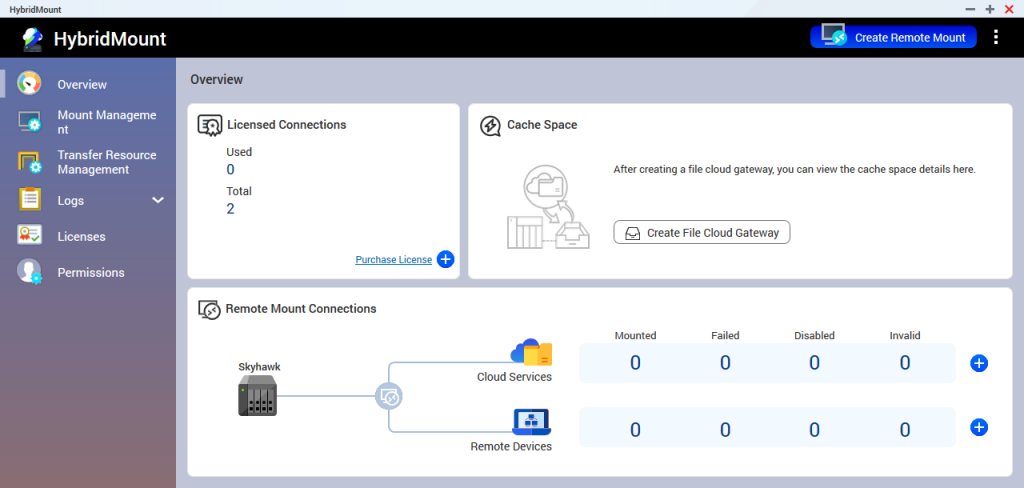
First, go to App Center in QTS and install the HybridMount
app. Once the installation is done, open the app and click “Create File Cloud
Gateway.”
In the popup, select Backblaze, fill in your Key ID and
Application Key, and click “Search” to fetch a list of buckets available to
this key. Select the bucket you’ll be using for HybridMount, and click “Next.”
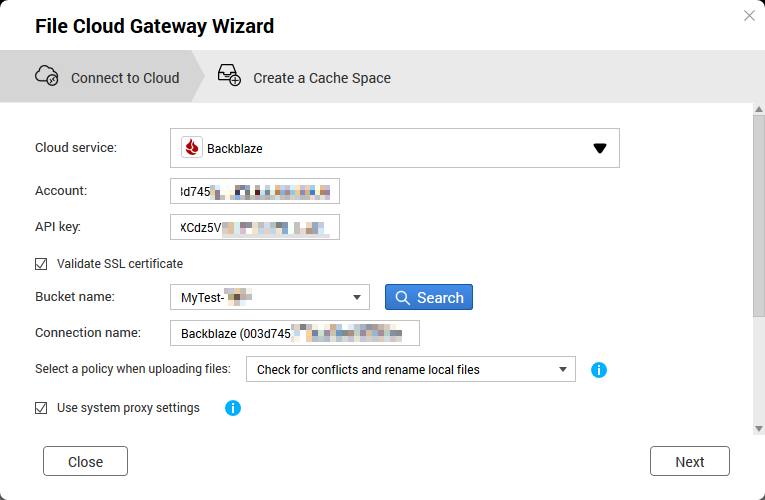
Select the storage pool you’ll use for creating a cache
volume, and specify the cache volume size. Finally, click “Create” and you’re good
to go!

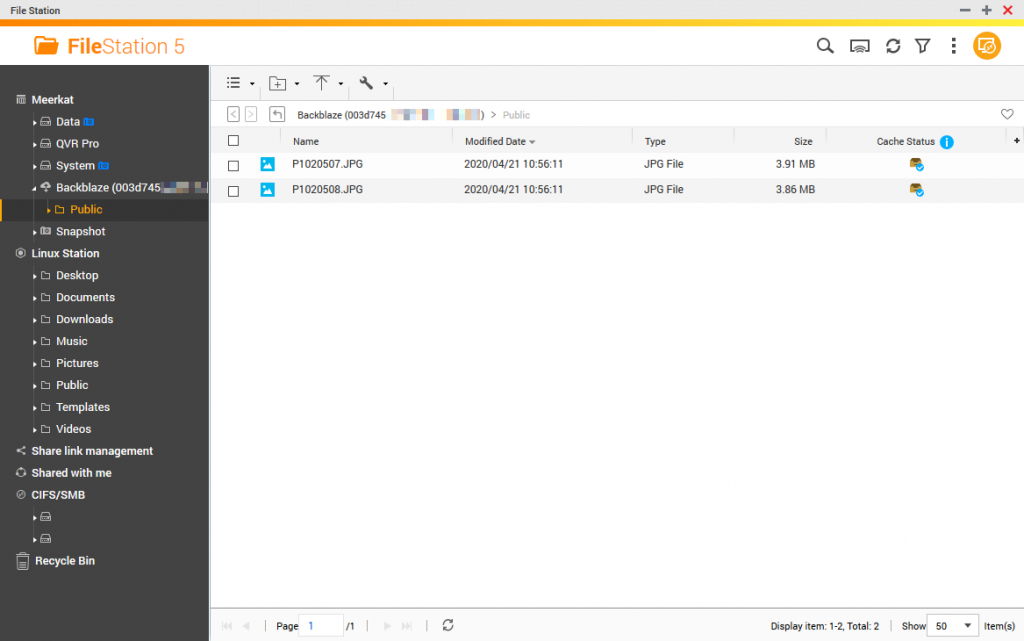
Now the Backblaze B2 bucket is connected to your NAS with a local cache volume. You can go to File Station in QTS to access it just like a shared folder. You can also use Samba/AFS/NFS protocols to mount the HybridMount space to your Windows/macOS/Linux PCs.
QNAP HybridMount offers multiple benefits, including intuitive operations and cost/bandwidth savings. To learn more, go to https://qnap.to/QYGGX. Backblaze B2 is a cloud storage solution that provides high performance data storage at one fourth the cost* of leading cloud storage providers. To learn more, go to https://www.backblaze.com/.
*As of April 2020; subject to changes without prior notices.