Adding to a long list of multimedia applications QNAP now includes easy integration with Roon, the music listening software that’s changing the game in the world of audio. If you’re interested in setting up your own audio system with QNAP and Roon, this tutorial will show you how to do it.
The Components of Roon
The main components of Roon are the core, the control, and the output. The core is the “brain” of the software and makes the unique music browsing experience that Roon offers possible; the control is where you actually access the UI to navigate and control your music; And the output is the end point where the music is played. Some downloads available will include all three components in one, while others may only function as one or two of the three. The QNAP implementation of Roon includes both the core and the output but lacks a controller.
Run the Roon Core on Your NAS
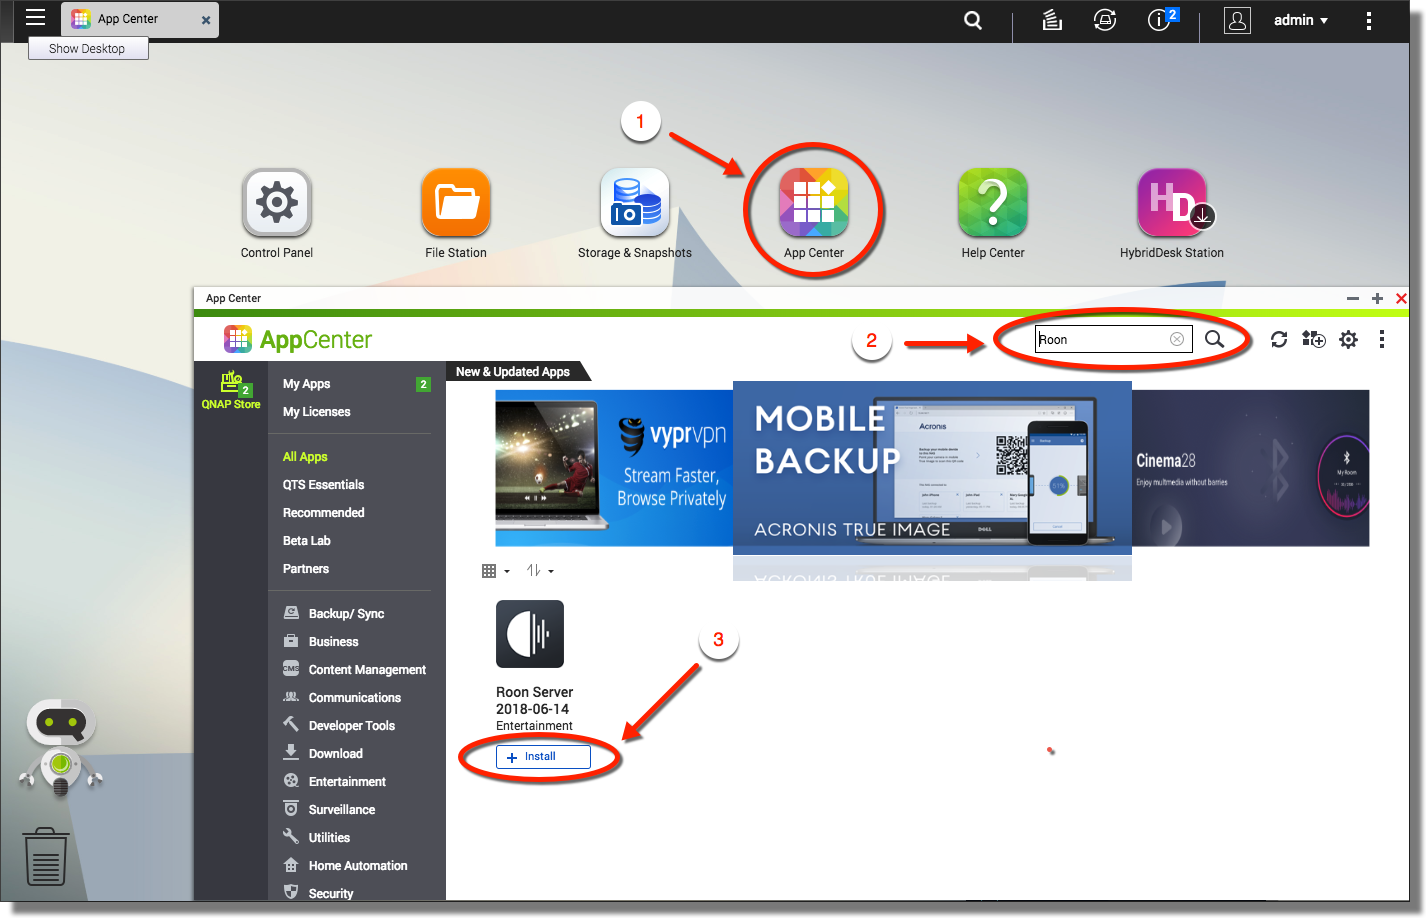
- Open App Center app in QTS
- Search for “Roon”
- Click [Install] to install the Roon server app
Once you have Roon installed click the open button to open the app and then when the window opens click the configure button. Here you will select where to store the Roon Core. Make your selection and click save. Now you’ll see the Roon Overview page. Here you can change where the database is stored or restart the Roon server.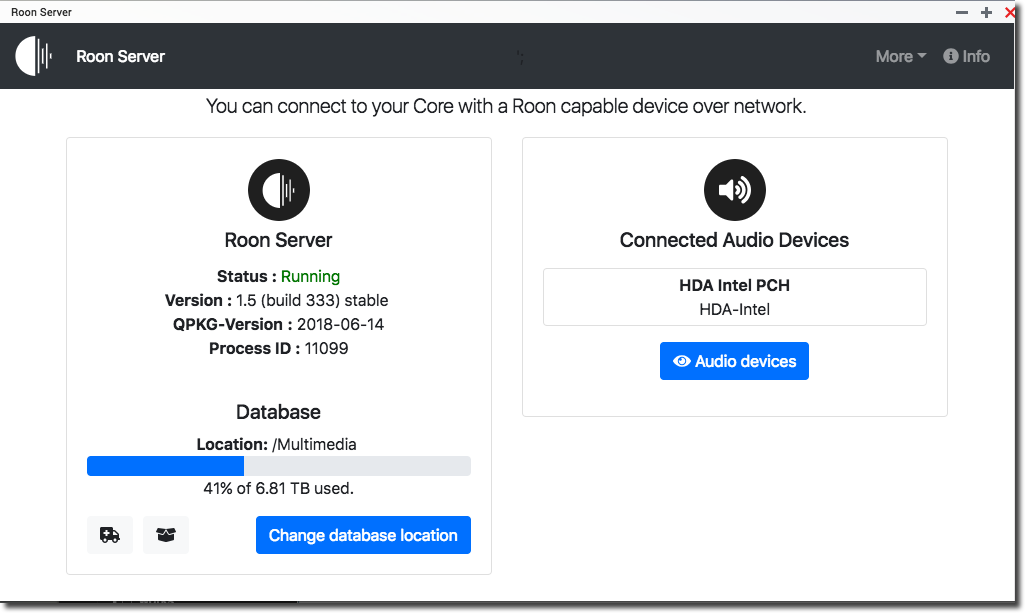
As mentioned above The Roon server on QNAP NAS doesn’t include the control, so you won’t actually be accessing the Roon UI on the NAS. For this you will need to use a device with the Roon controller installed on it.
Get a Controller
You can use your mobile device as a controller for Roon. Just download the app. When you open the Roon app on your phone make sure that you are connected to the same network that the NAS is on. Once you’ve opened the Roon app all of the available Roon cores on your network will be available.
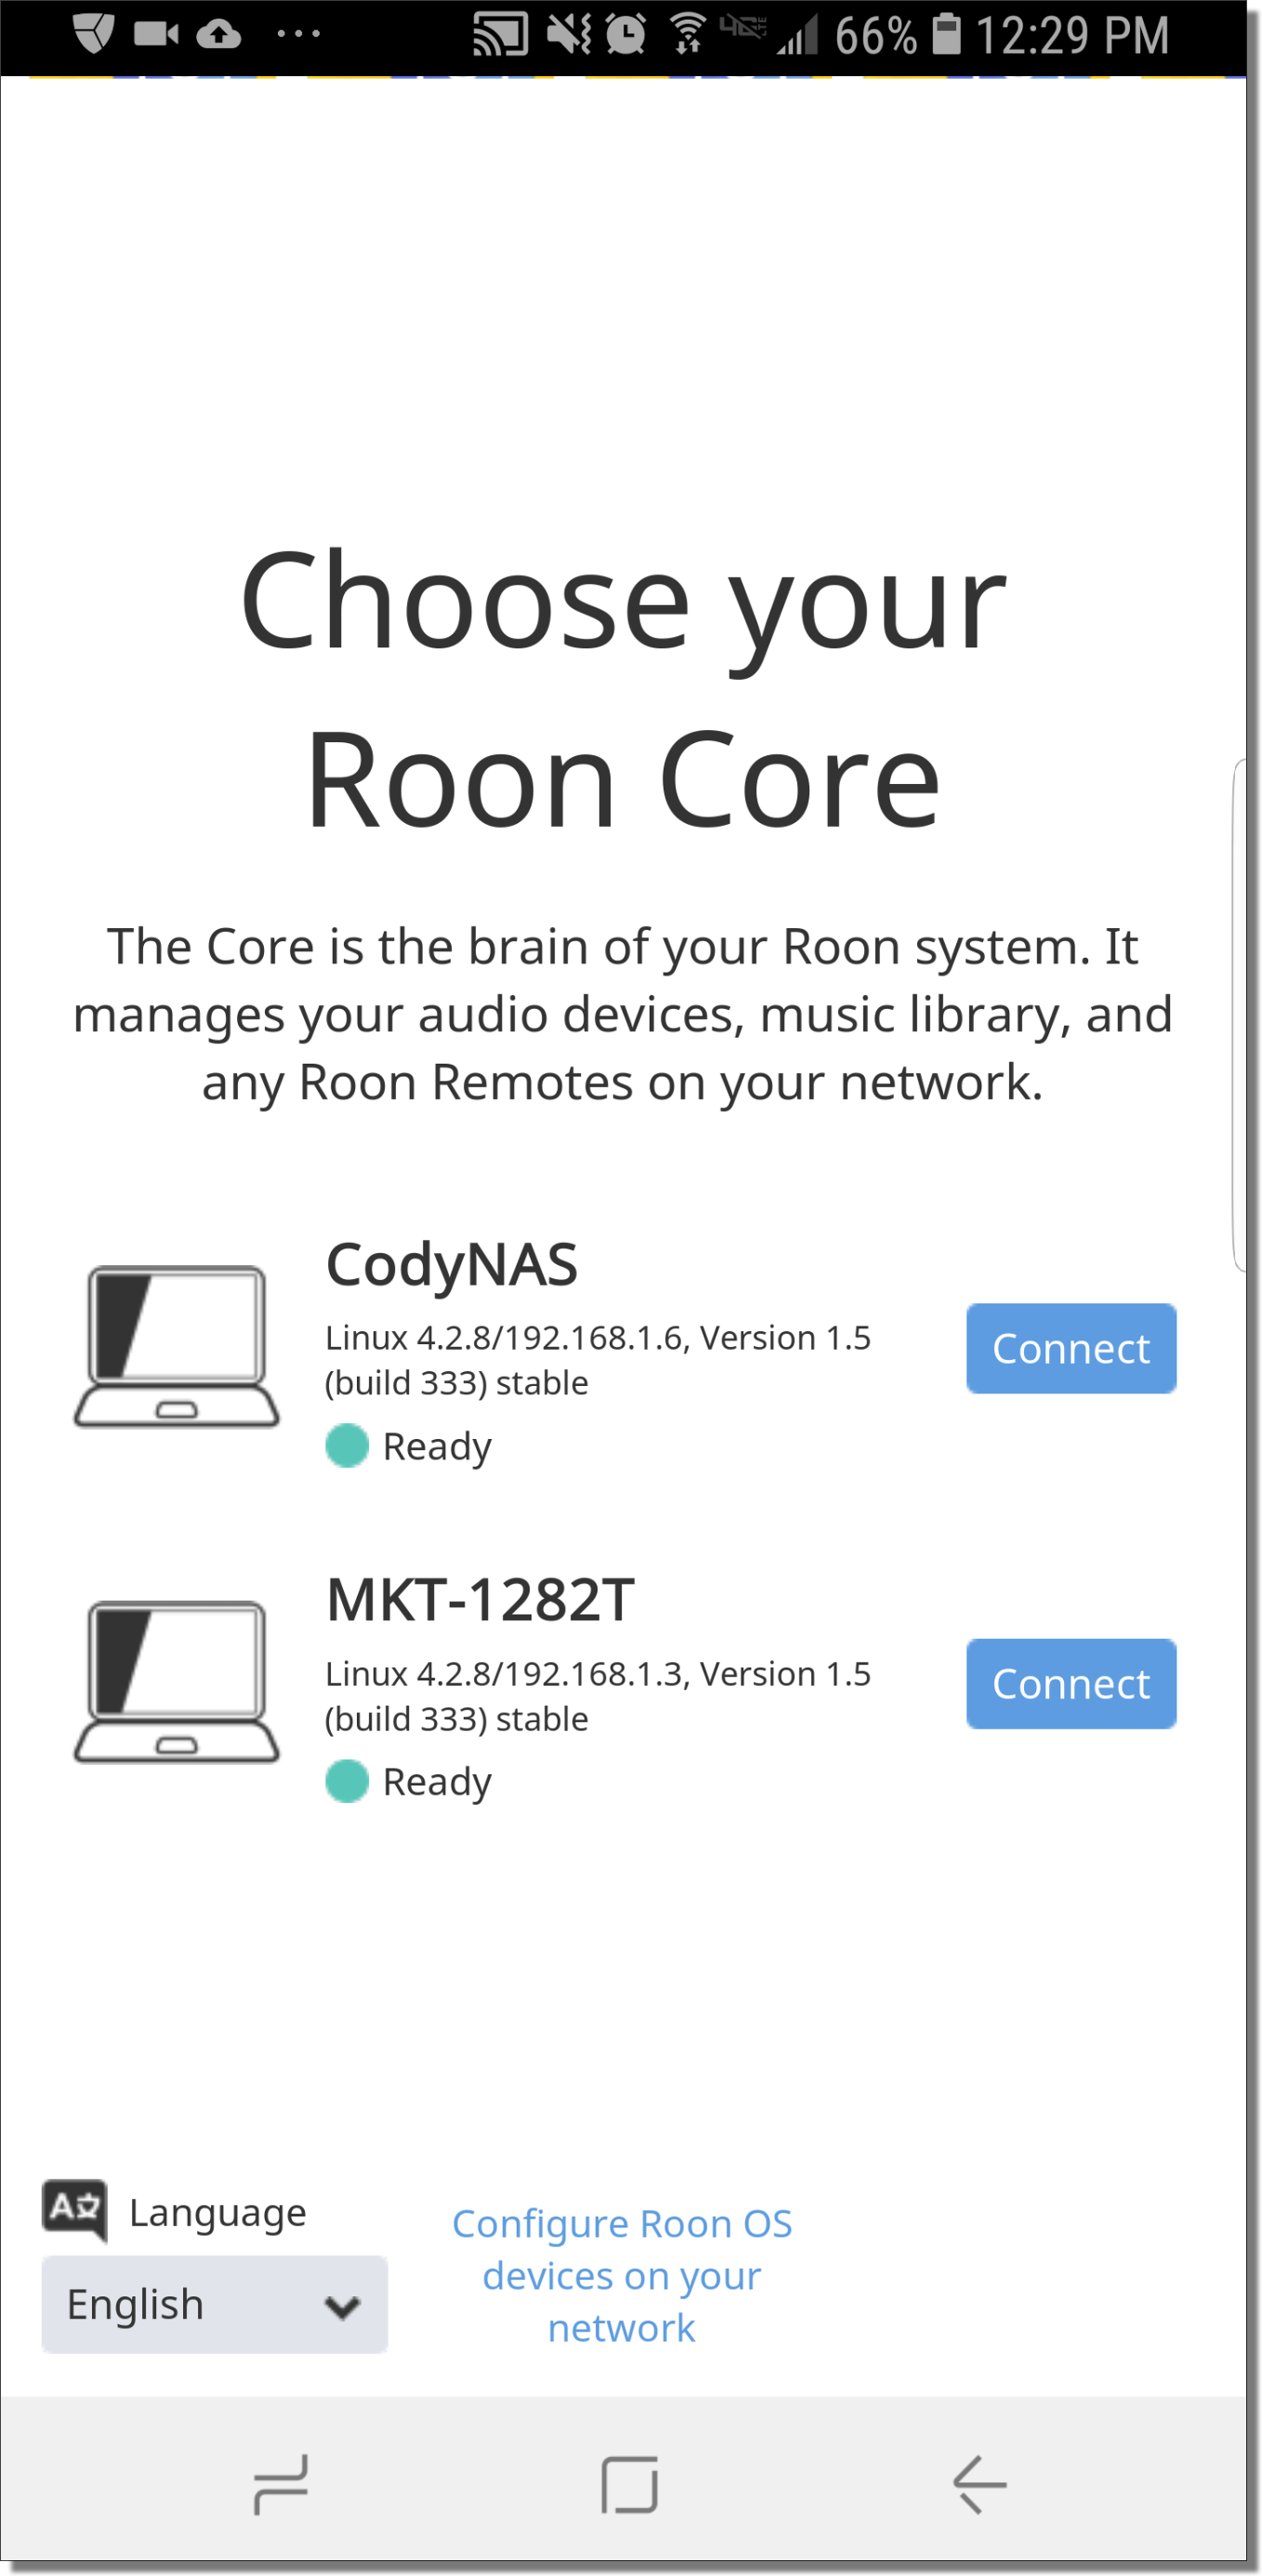
Click the connect button to choose a core to connect to. After connecting to the core you will be prompted to sign into your Roon account. If you don’t already have a Roon account you can start a free trial.
On the next page you can add your music sources. Click the “Add Folder” button to select a source folder.
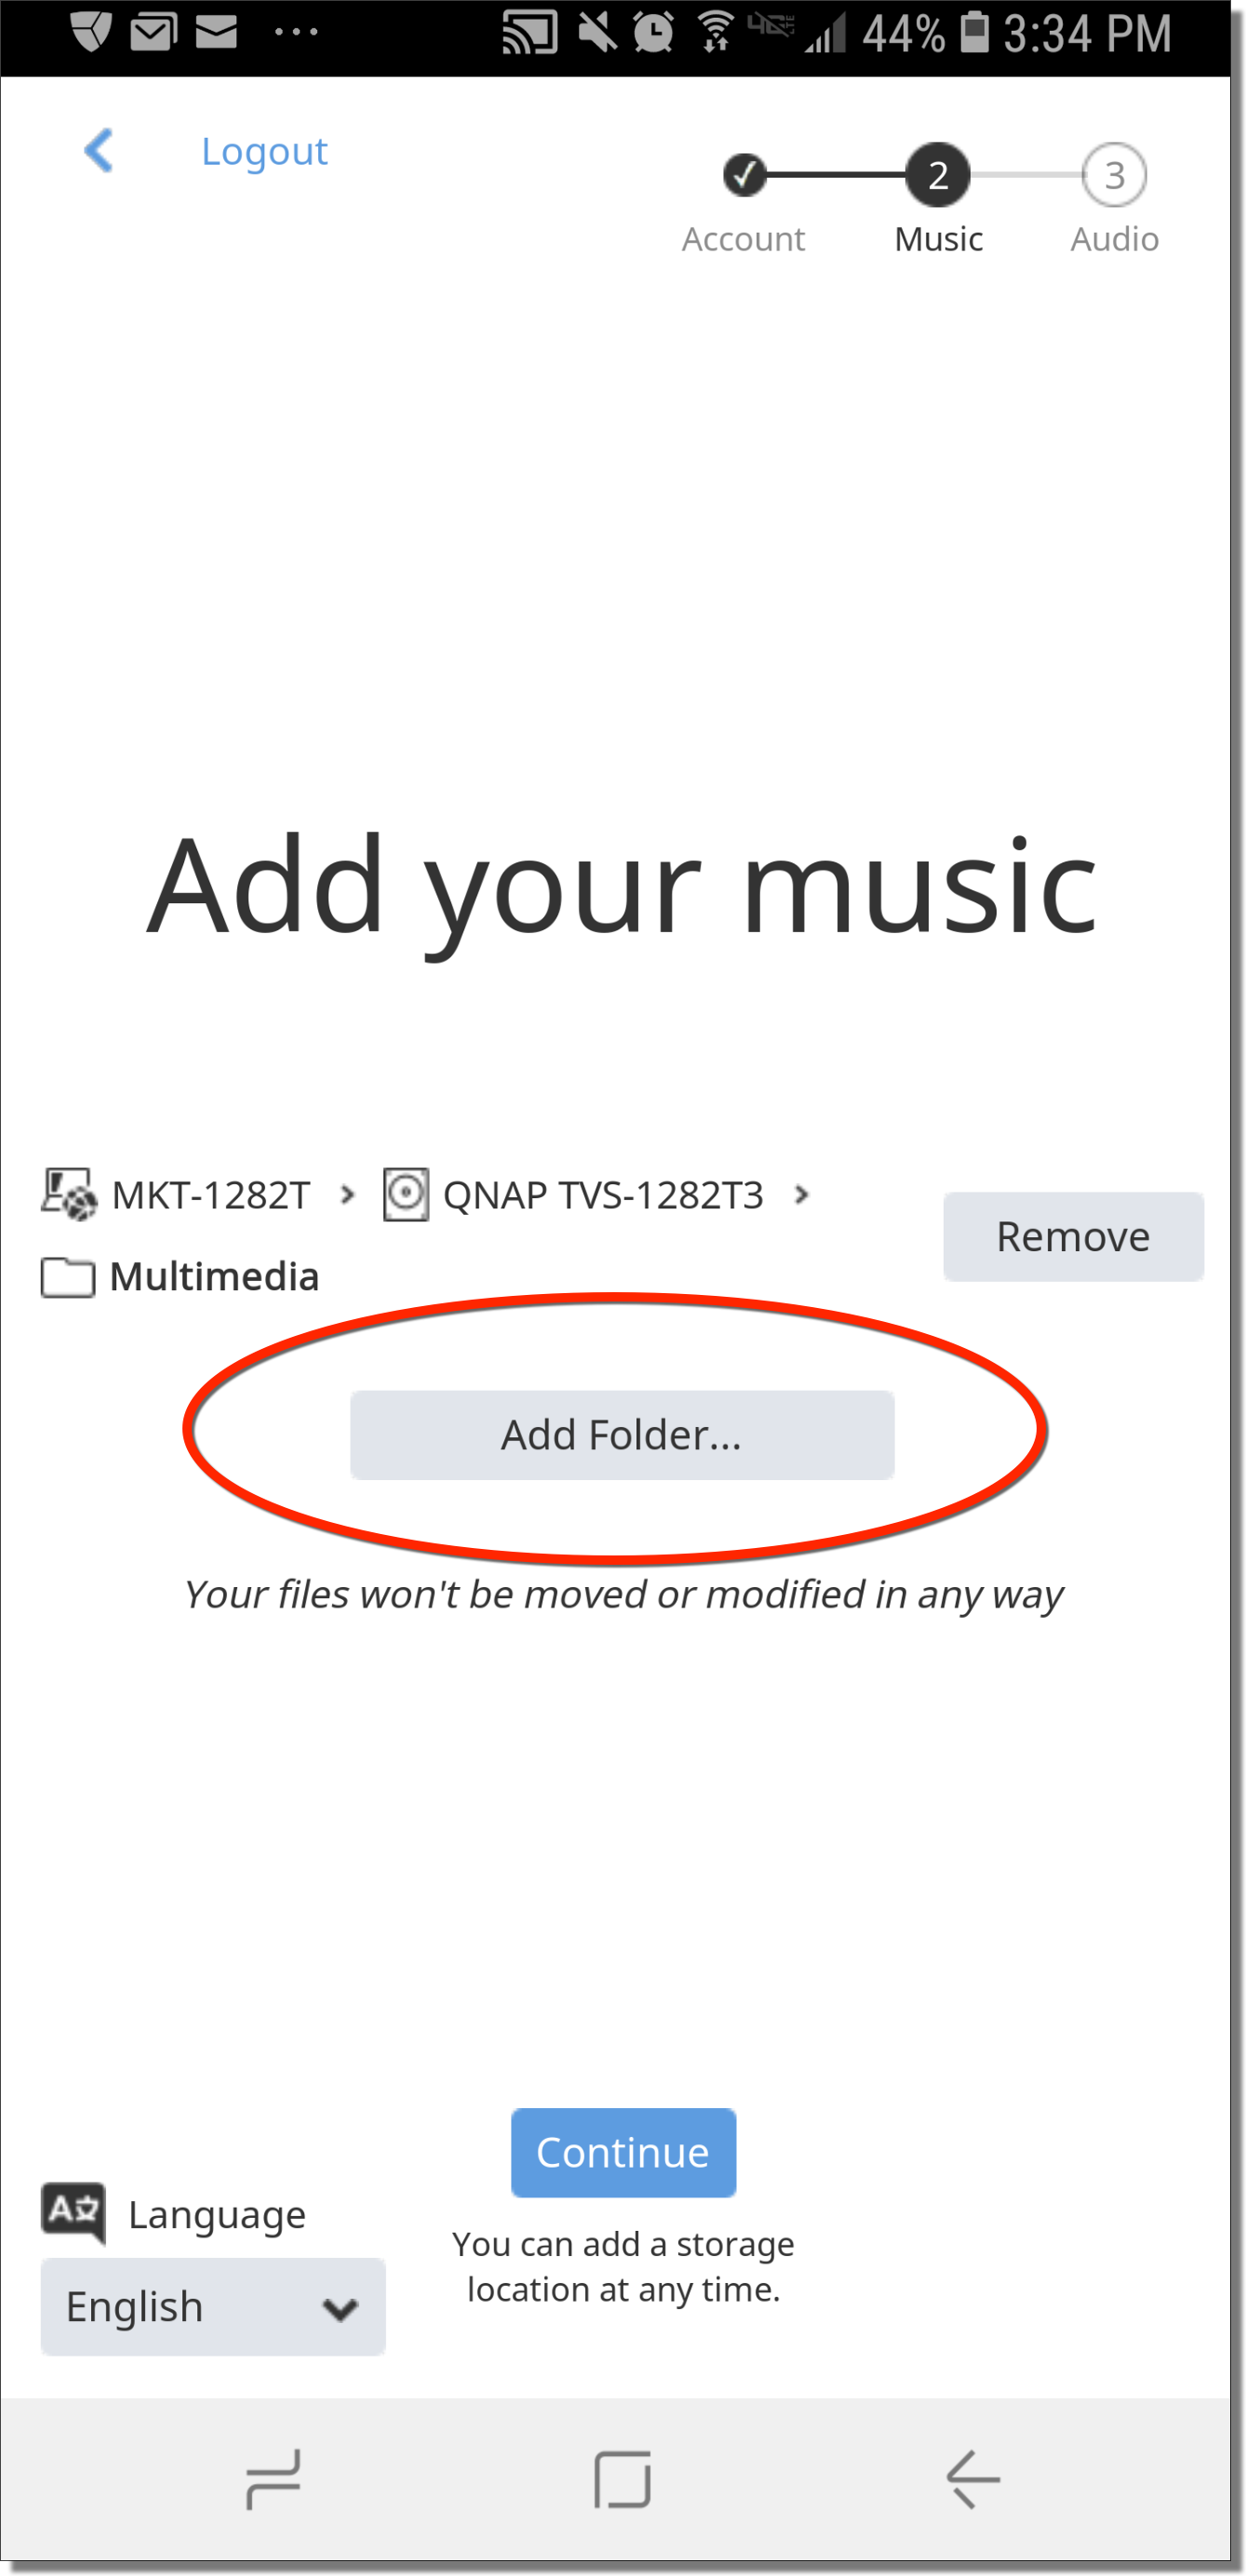
Once you have clicked “add folder” you can also add other sources from your network.
Find a Connected Output Device on Your Network
First off, you’ll want to make sure that the sound equipment you want to use is connected to the same network as your core and your controller. Once this is established, you can go to the album page and select the output from there. Just click on the down arrow next to the “Play Now” button
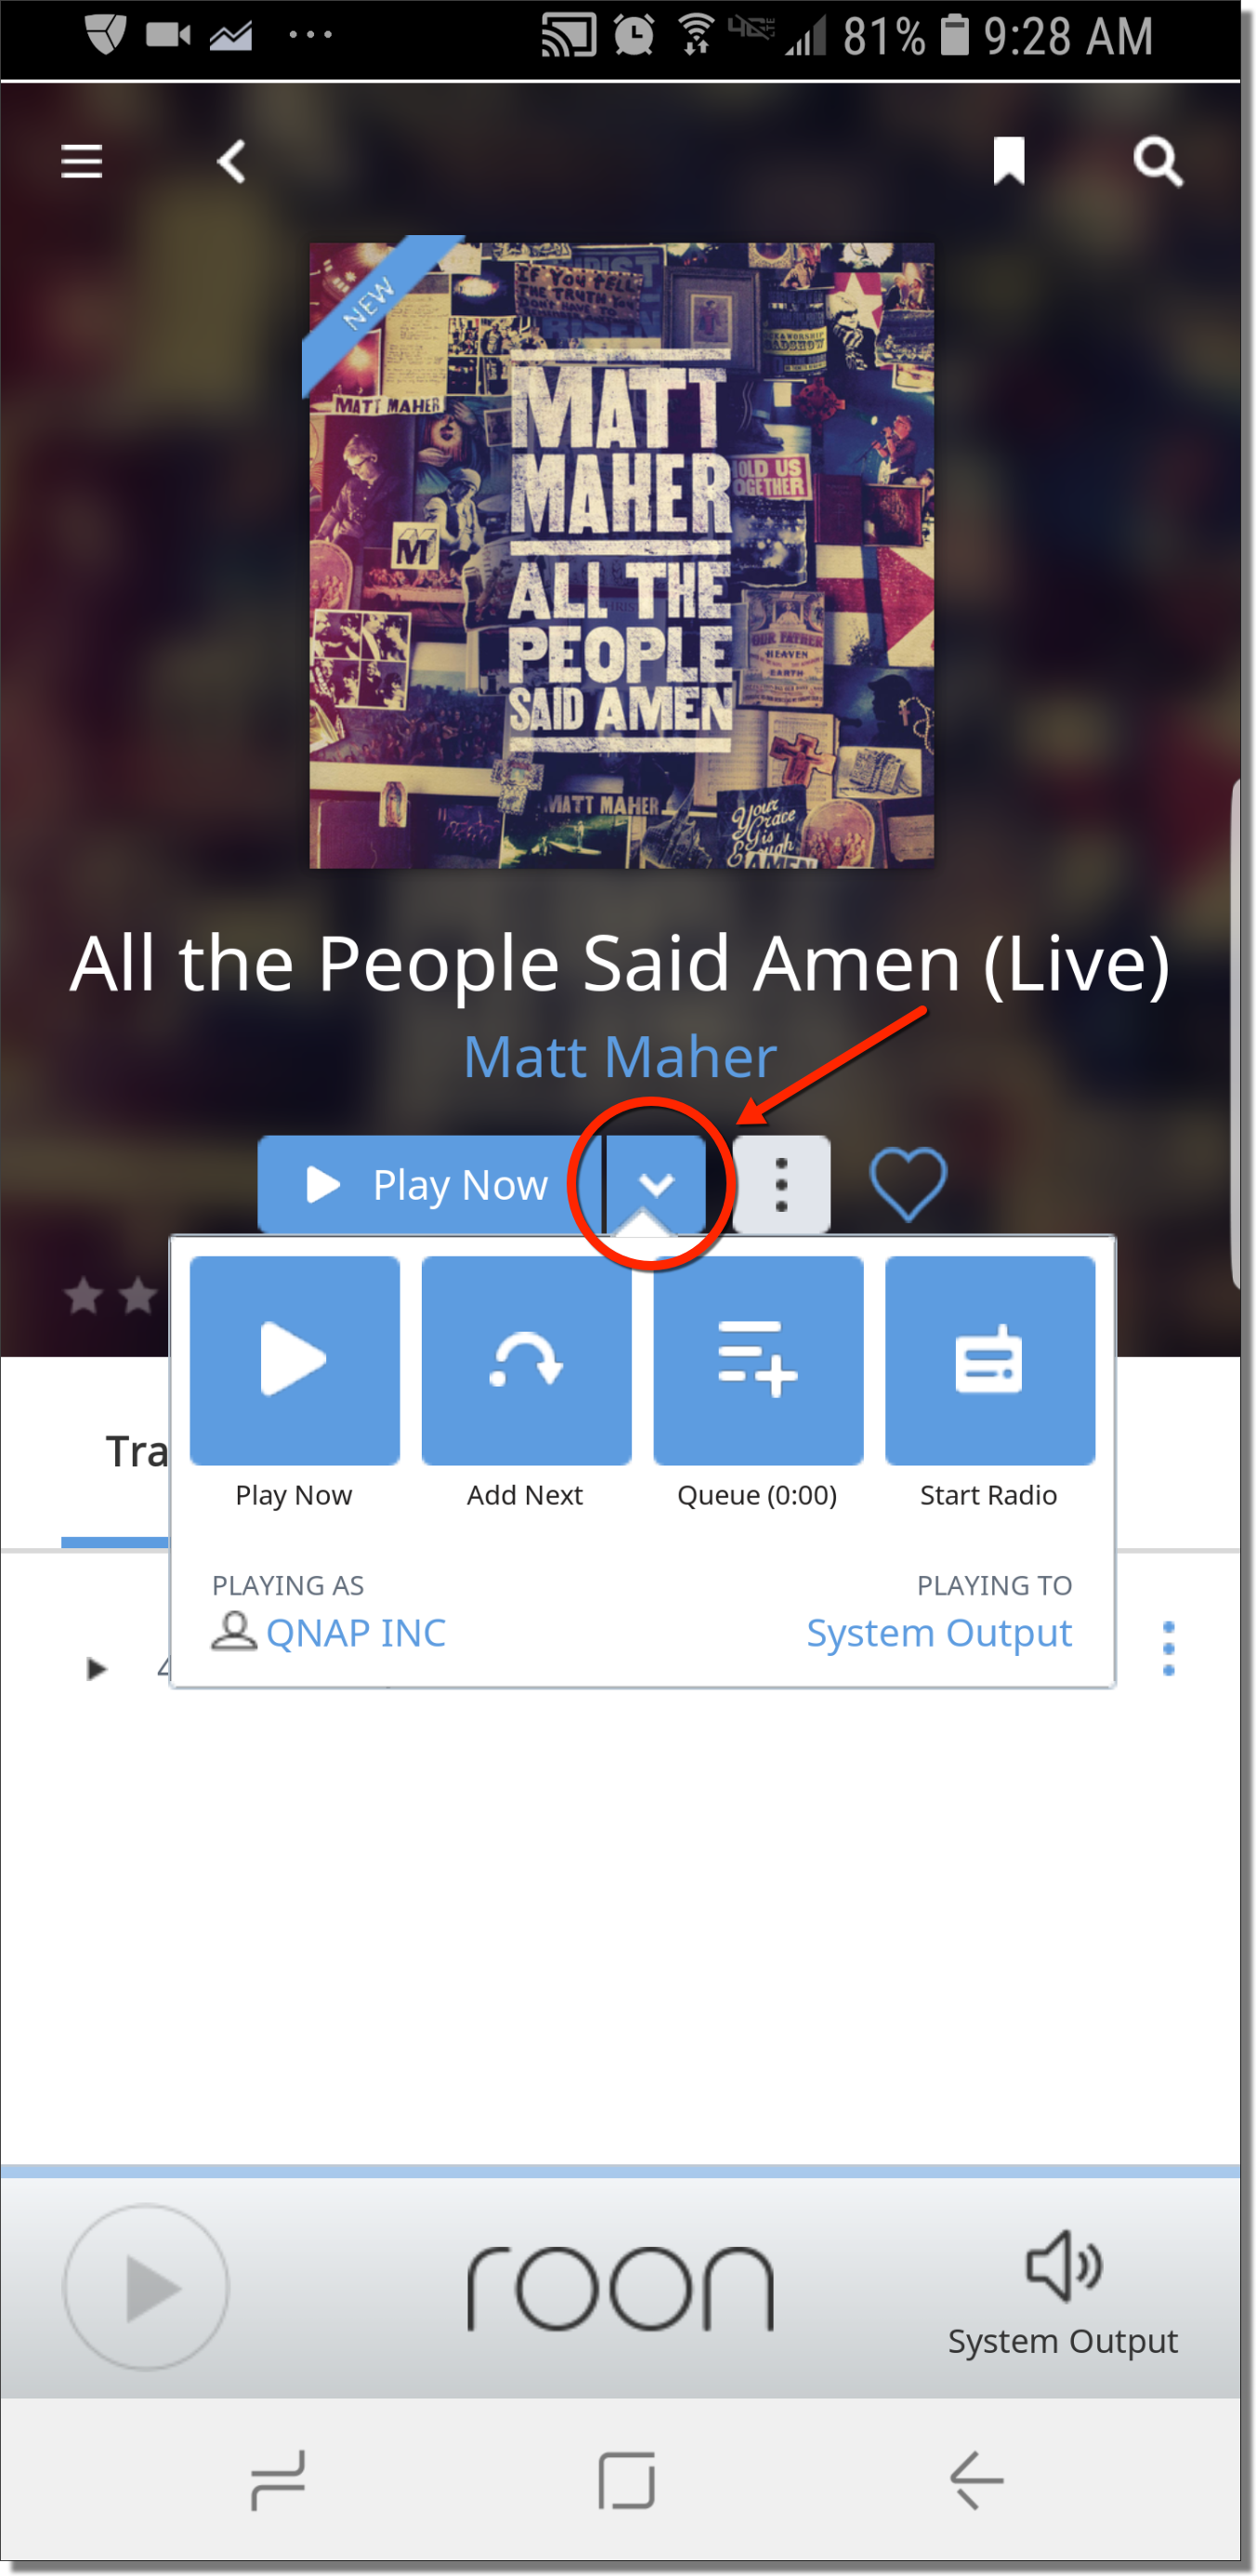
and then you can select an output under where it says, “Playing To”.
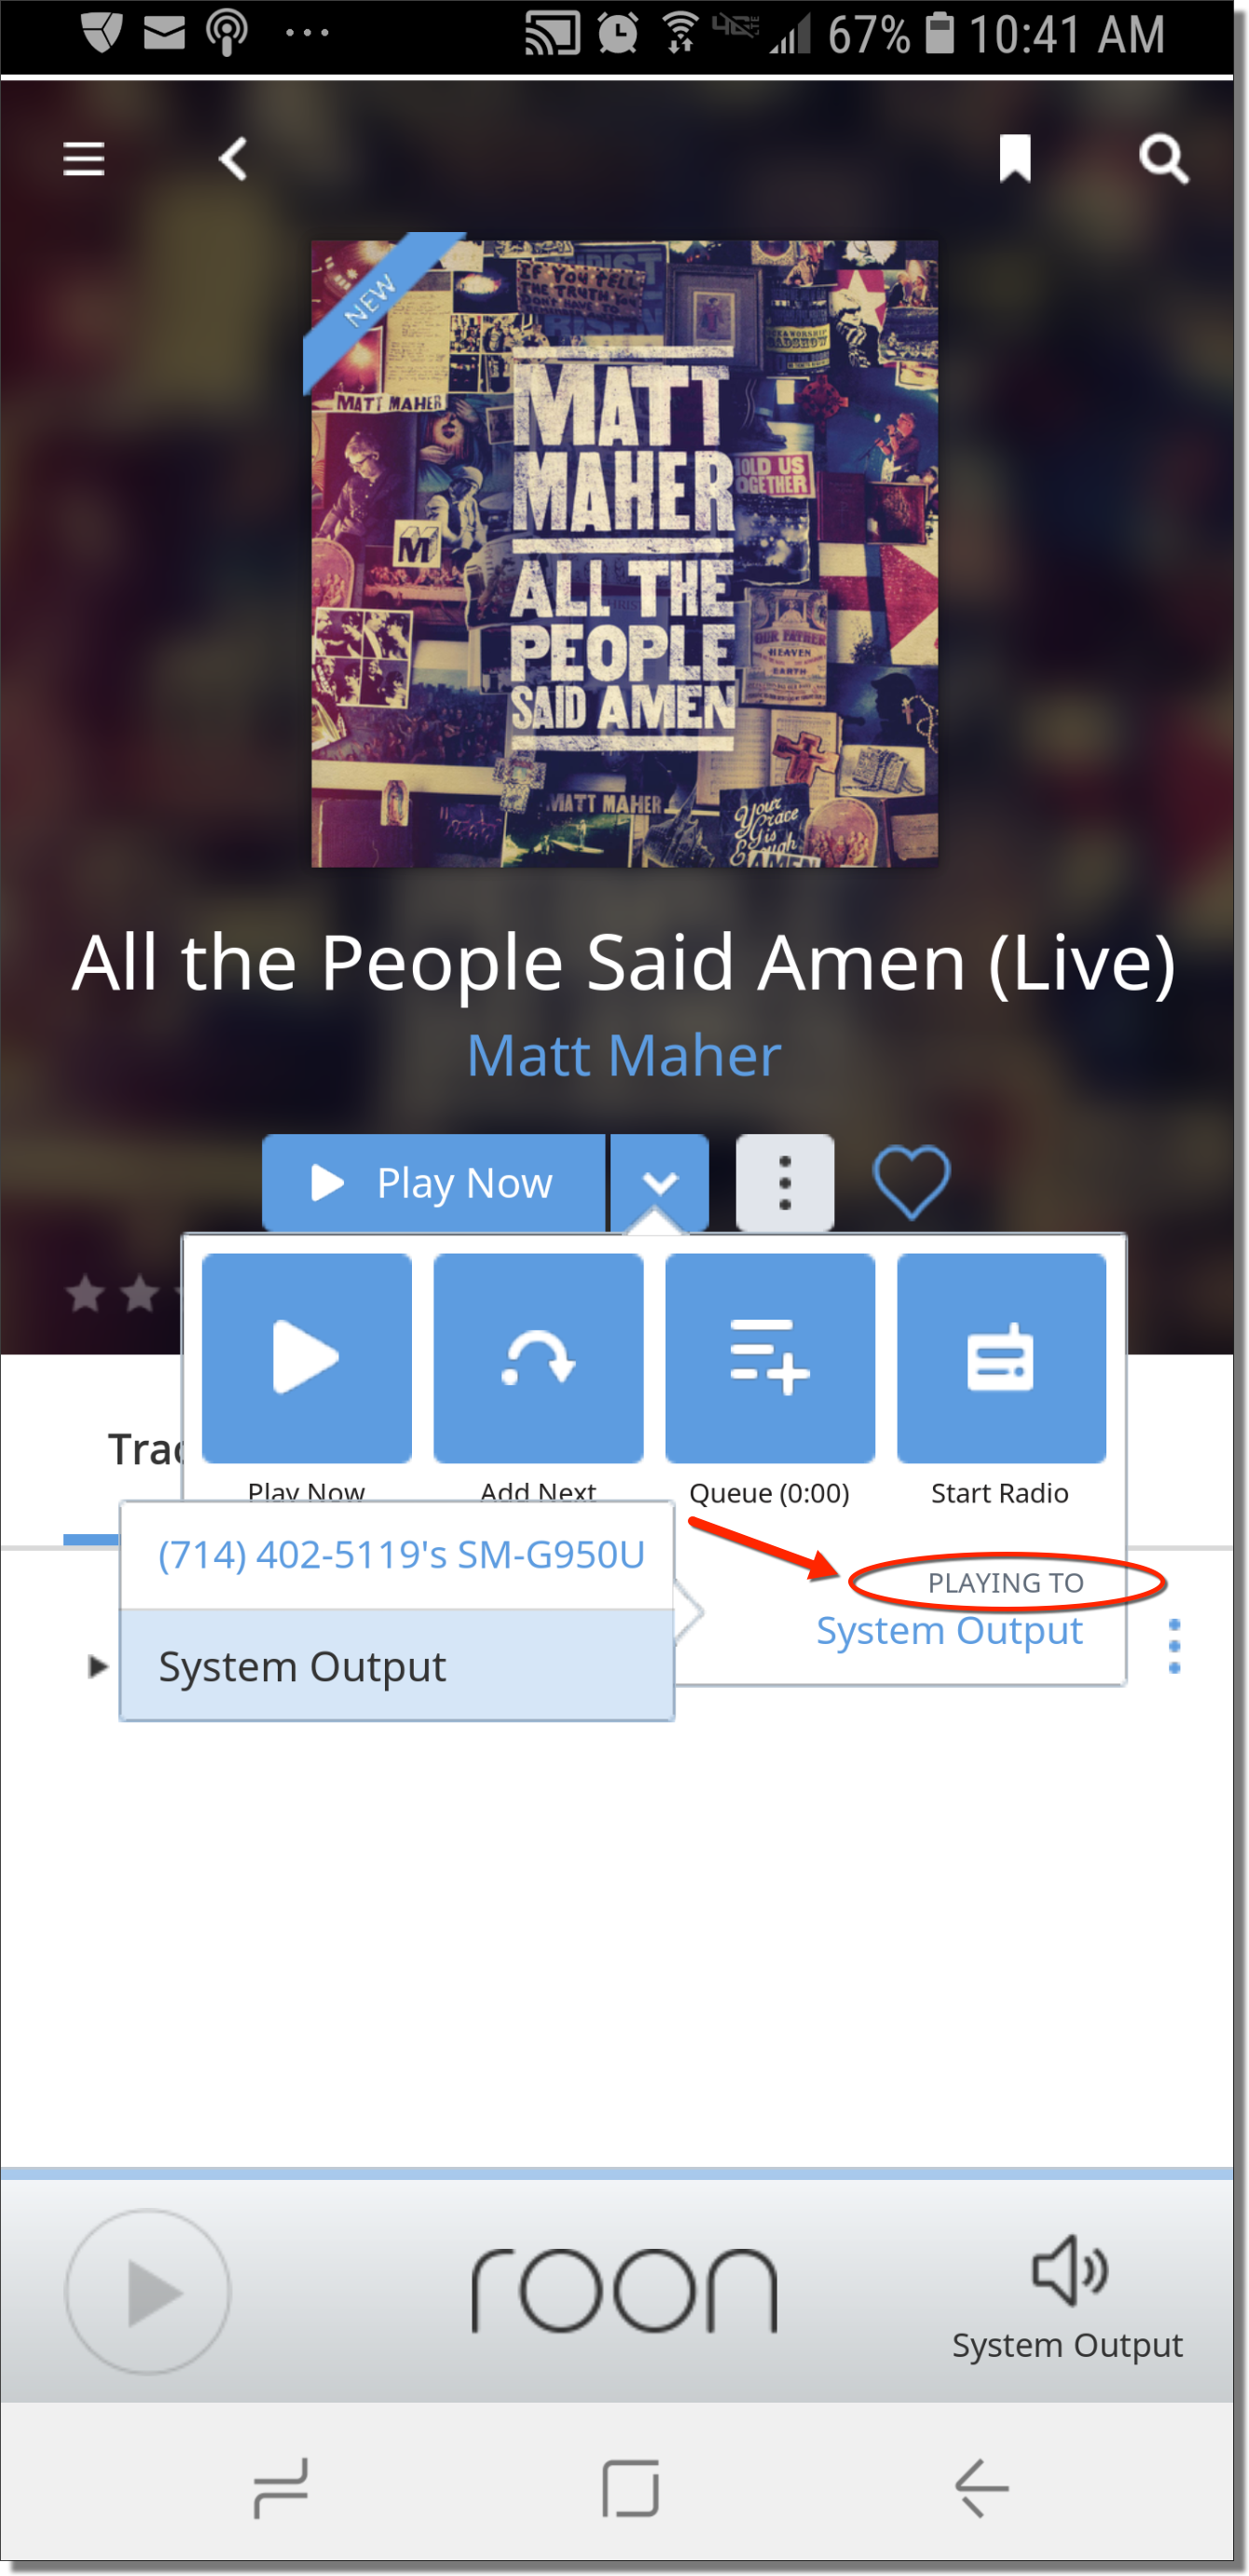
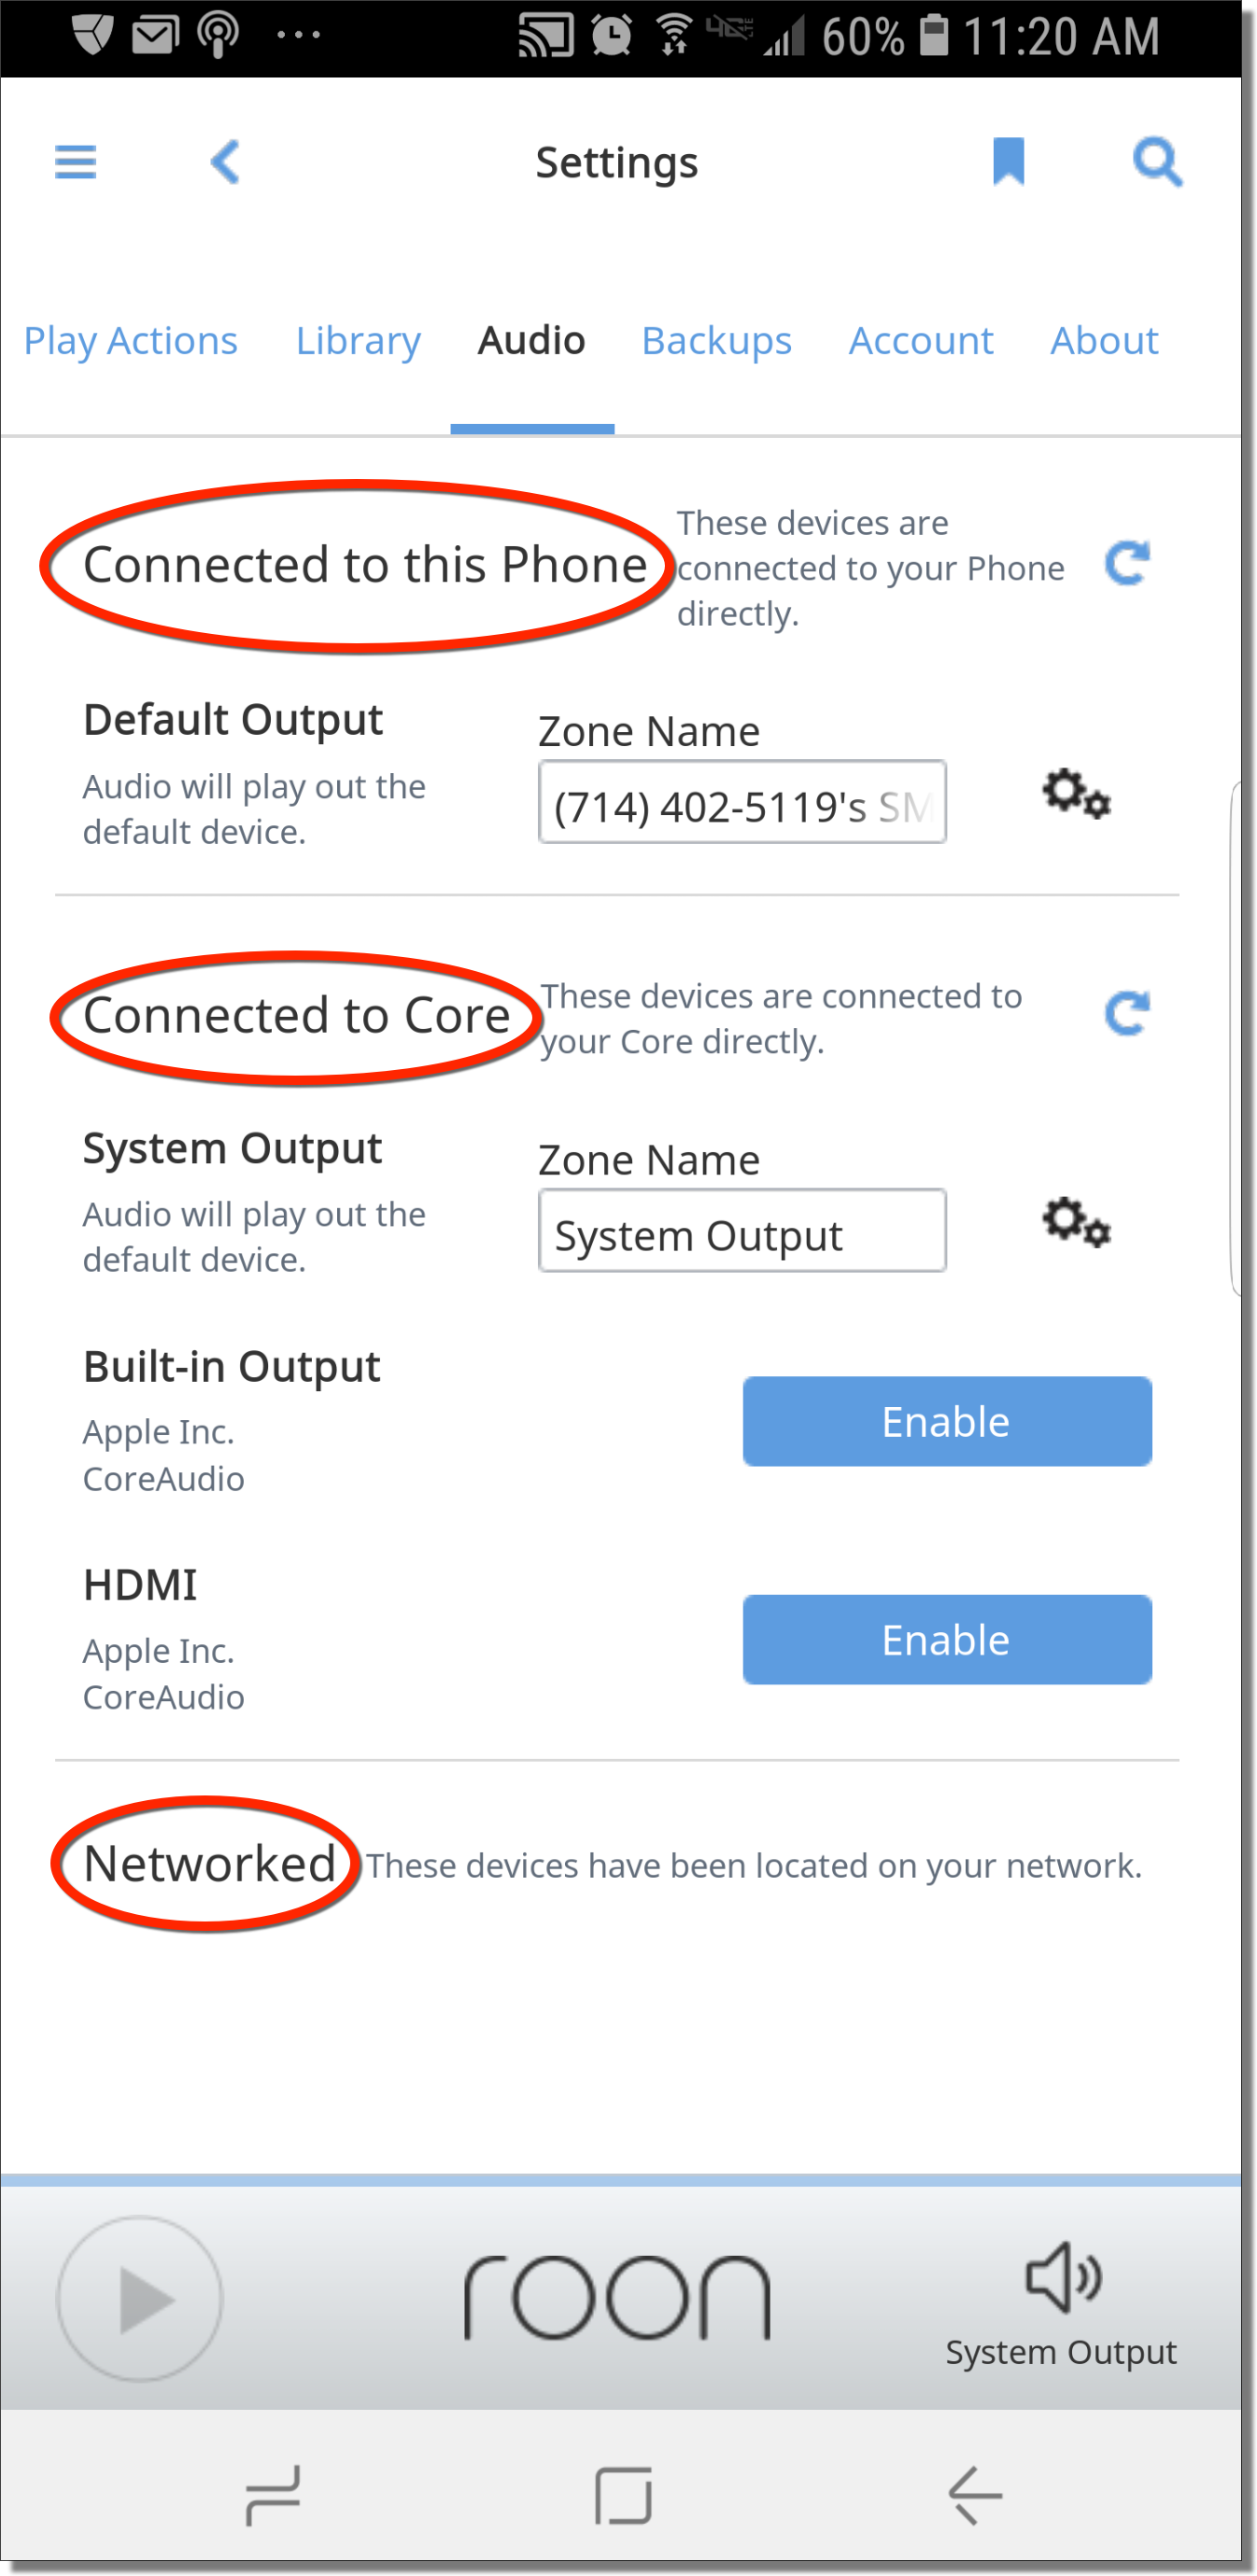
Now you have everything in place to navigate and play your music. If you want to add more audio sources you can go to the “Audio” section under “Settings” and enable any audio output devices that are connected to the mobile device, the core, or the network.
Now you should have everything you need. Enjoy your music!
